
How to Transfer Photos from iPhone to Computer
Transferring files from your iPhone to a computer is a common task that can help you back up important data, free up space on your device, or simply move files for easier access on a larger screen. Whether you’re looking to transfer photos, videos, documents, or any other type of file, the process can be straightforward and requires just a few steps. This guide will provide you with a comprehensive introduction to the different methods available for transferring files from your iPhone to a computer, including using USB cables, cloud services, and other wireless options. We’ll cover both Windows and Mac computers, ensuring that no matter what type of PC you have, you’ll be able to easily move your files. Whether you’re a seasoned tech enthusiast or a novice looking for simple solutions, this guide will help you seamlessly navigate the process of transferring your valuable data from your iPhone to your computer.
Transferring files from one PC to another is a common task that can sometimes require expert assistance, especially when dealing with large amounts of data or sensitive information. Finding a reliable “PC repair near me” can ensure that this process is done smoothly and securely, minimizing the risk of data loss. Whether you’re upgrading to a new computer, backing up important documents, or simply sharing files between workstations, a “PC repair near me” service can offer the technical expertise needed to facilitate these transfers efficiently. Moreover, in the event of technical difficulties or compatibility issues during the transfer process, the expertise of a “PC repair near me” becomes invaluable, providing peace of mind and ensuring that your data remains intact and accessible across all your devices.
Why would i want to transfer my files form my iPhone?
Transferring files from your iPhone to a PC can be beneficial for several reasons, spanning from practical data management to enhancing your device’s performance. Here are some of the primary reasons why you might want to transfer your files:
1. Backup and Data Protection
- Secure Important Files: Transferring files to a PC can serve as a backup, ensuring that you have another copy of your important photos, videos, documents, and other data in case your iPhone is lost, stolen, or damaged.
- Archive Purposes: Keeping a backup of your files on a PC helps in archiving older data that you don’t need immediate access to but don’t want to delete permanently.
2. Free Up Space on Your iPhone
- iPhones have limited storage capacity, and high-quality photos and videos can quickly consume space. Transferring files to a PC can free up space on your iPhone, improving its performance and allowing you to download new apps, take more photos, and store more music.
3. Edit and Manage Files More Easily
- Editing: Some tasks, such as editing photos, videos, or large documents, are easier to perform on a PC due to the larger screen size, more powerful software options, and better hardware capabilities.
- File Management: PCs often offer more sophisticated file management systems, making it easier to organize, search, and manage large numbers of files.
4. Sharing and Accessibility
- Easier Sharing: Transferring files to a PC can make it easier to share them, whether you’re emailing documents, uploading photos to a website, or using cloud storage services that you manage from your PC.
- Access Files on Multiple Devices: Having your files on a PC can make them more accessible across different devices, especially if you use a service that syncs files across your computer, tablet, and phone.
5. Printing
- Transferring files, especially documents and photos, to a PC can make printing them much easier, as you can manage printer settings more effectively on a computer.
6. Legal and Business Requirements
- In some cases, transferring files to a PC is necessary for legal, business, or educational purposes, where files need to be stored on a secure, centralized system for record-keeping or compliance reasons.
7. Use PC-specific Software
- Certain software is available only on PCs and not on iPhones, so transferring files to a PC might be necessary to use these applications for editing, analysis, or other specialized tasks.
Transferring files from your iPhone to a PC not only helps in managing your digital life more effectively but also ensures that your valuable data is secure and accessible when you need it. Whether for practical, organizational, or creative reasons, moving files between devices is a key aspect of modern digital management.
Transfer to PC
Transferring files from an iPhone to a PC can be done through various methods, each with its own steps. Below are the most common methods to accomplish this task:
1. Using iTunes (or Finder for macOS Catalina and later)
For Windows and older macOS versions:
- Install iTunes from the Apple website or Microsoft Store.
- Connect your iPhone to the PC using a USB cable.
- Open iTunes and select your device.
- Choose the type of content you want to sync (e.g., Photos, Music) and follow the on-screen instructions to sync.
- To transfer files like photos, select “Photos” in iTunes, check “Sync Photos,” and choose the folder where you want to sync the photos.
Note: macOS Catalina and later uses Finder instead of iTunes for device management, but the process is similar.
2. Using iCloud
- Ensure iCloud is enabled on your iPhone for the types of data you wish to transfer (Settings > [your name] > iCloud).
- On your PC, download and install iCloud for Windows.
- Sign in with your Apple ID and select the type of content you want to sync or download.
- Files will be automatically downloaded to your PC or available for download manually, depending on your settings.
3. Using Windows Photos App
- Connect your iPhone to the PC with a USB cable.
- Unlock your iPhone and trust the computer.
- Open the Photos app on your PC.
- Click on “Import” and then “From a USB device” to select the photos and videos you want to import.
4. Using File Explorer
- Connect your iPhone to your PC using a USB cable.
- Unlock your iPhone and trust the computer.
- Open File Explorer on your PC.
- Your iPhone will appear under “This PC” as a device.
- Open the iPhone device and navigate to “Internal Storage” > “DCIM” to access your photos and videos.
- Copy and paste or drag and drop the files from your iPhone to your PC.
5. Using Third-party Software
There are numerous third-party applications available that can facilitate the transfer of files from your iPhone to a PC. These can often provide more flexibility and options for managing your data, such as wireless transfers, but it’s important to choose reputable software to ensure the security of your data.
Each method has its advantages and may be better suited for different types of files or user preferences. Whether you’re looking to transfer photos, videos, documents, or other data, one of these methods should suit your needs.
Transfer to Apple
Transferring files from an iPhone to an Apple computer (Mac) can be accomplished using several methods, each catering to different types of files and user preferences. Below are the most common methods:
1. Using AirDrop
AirDrop is a quick and wireless way to transfer files between Apple devices.
- On your iPhone: Swipe up or down (depending on your model) to access the Control Center and ensure AirDrop is enabled.
- On your Mac: Go to Finder > AirDrop and turn on Bluetooth and Wi-Fi to make your Mac discoverable.
- Select the file you wish to transfer on your iPhone, tap the share icon, and choose your Mac from the AirDrop section.
- Accept the file on your Mac when prompted.
2. Using iCloud
iCloud provides a seamless way to keep files synchronized across all your Apple devices.
- On your iPhone: Go to Settings > [your name] > iCloud. Turn on iCloud Drive and ensure all apps that you want to sync are enabled.
- On your Mac: Go to System Preferences > Apple ID > iCloud and ensure iCloud Drive is checked, along with any specific apps you want to sync.
- Files saved to iCloud from your iPhone will automatically be accessible from your Mac’s Finder under iCloud Drive.
3. Using Finder (macOS Catalina and later)
- Connect your iPhone to your Mac using a USB cable.
- Unlock your iPhone and trust the computer if prompted.
- Open Finder on your Mac, and your iPhone should appear in the sidebar under “Locations.”
- Click on your iPhone, and you can access files, back up, manage, and sync content from this window.
4. Using Photos App
For transferring photos and videos, the Photos app provides an easy interface.
- Connect your iPhone to your Mac with a USB cable.
- Open the Photos app on your Mac.
- The app should automatically display an import screen with all the photos and videos on your iPhone. If not, click on your iPhone under “Devices” in the sidebar.
- Select the photos and videos you want to import and choose where to import them.
5. Using iTunes (for macOS Mojave and earlier)
- Connect your iPhone to your Mac using a USB cable.
- Open iTunes and select your device.
- Choose the type of content you wish to sync (e.g., music, movies, photos, books) and follow the on-screen instructions to sync.
6. Using File Sharing for Apps
Some apps support file sharing through iTunes (for macOS Mojave and earlier) or Finder (for macOS Catalina and later).
- Connect your iPhone to your Mac and open iTunes (Mojave and earlier) or Finder (Catalina and later).
- Select your device and go to the “File Sharing” section.
- Select the app you want to transfer files from and save files to your Mac or add files to your iPhone.
Tips:
- Ensure both your iPhone and Mac are signed in with the same Apple ID for seamless AirDrop and iCloud functionality.
- Regularly back up your iPhone to your Mac to ensure you have a copy of all important files.
These methods cover the majority of needs for transferring files between an iPhone and a Mac. Whether you’re looking to move photos, documents, or other data, these solutions provide a range of options to suit different requirements.
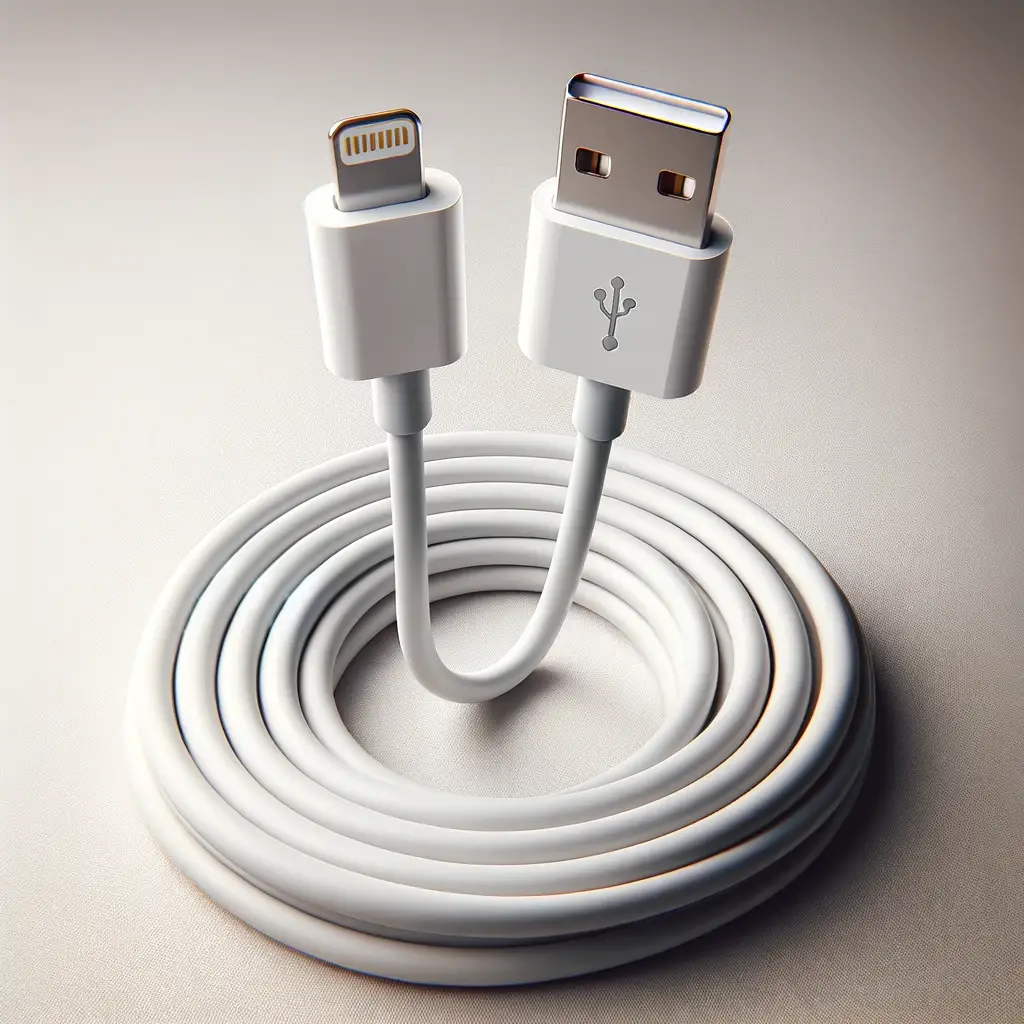
Using the original Apple device cable for best results
Using the original Apple cable (or a certified third-party cable that meets Apple’s standards) when transferring files from your iPhone to your computer is important for several reasons, all of which contribute to the efficiency, safety, and reliability of the data transfer process. Here are the key reasons:
1. Data Transfer Reliability
- Consistent Performance: Original Apple cables are designed to meet specific performance standards, ensuring a stable and consistent connection between your iPhone and computer. This results in faster and more reliable file transfers, reducing the risk of data corruption or transfer errors.
2. Charging Safety
- Safe Charging: Original Apple cables are manufactured to comply with Apple’s safety standards, ensuring that your iPhone charges safely while connected to your computer. Counterfeit or low-quality cables might not regulate electricity properly, potentially damaging your iPhone’s battery or the charging port.
3. Compatibility
- Guaranteed Compatibility: Apple cables are specifically designed for Apple devices, ensuring full compatibility with all features, including data transfer, charging, and syncing. Some third-party cables might not be fully compatible, leading to connectivity issues or limited functionality.
4. Durability and Quality
- High-Quality Materials: Apple uses high-quality materials to manufacture its cables, making them more durable and less likely to fray, break, or malfunction compared to many third-party options. While Apple cables may wear out over time, they generally offer better longevity and performance.
5. Avoiding Damage to Your Devices
- Preventing Hardware Damage: Using non-certified cables can sometimes lead to hardware damage, either to the USB port on your computer or the Lightning port on your iPhone. Original or certified cables are designed to prevent such damage.
6. Software Compatibility
- Software Updates: Apple frequently updates iOS to introduce new features and improve security. Using an original cable ensures compatibility with these updates, allowing for seamless software installations and backups via iTunes or Finder (for macOS Catalina and later).
7. Avoiding Error Messages
- Error-Free Connection: Non-Apple cables can sometimes trigger error messages on your iPhone or computer, warning that the accessory is not supported. These messages can interrupt file transfers or prevent the device from connecting altogether.
Certified Third-Party Options
If the original Apple cable is not available, it’s recommended to use third-party cables that are certified by Apple’s MFi (Made for iPhone/iPad) program. MFi-certified products have been tested and approved by Apple to meet their quality and performance standards, offering a safe alternative to Apple’s own cables.
In conclusion, while it may be tempting to opt for a cheaper, non-certified cable, the potential risks to your device’s performance, battery health, and overall lifespan make it clear why using the original Apple cable or a certified alternative is a worthwhile investment.
Is transferring my files to my computer secure?
Transferring files from your iPhone to your computer can be secure, but the level of security largely depends on the method of transfer, the security of the devices involved, and the precautions taken by the user. Here are key points to consider ensuring the security of your data during the transfer:
1. Use of Secure Methods
- Wired Connections: Using a USB cable to transfer files directly from your iPhone to your computer is generally secure as it doesn’t expose your data to external networks. Ensure you’re using an original or certified cable to avoid potential vulnerabilities.
- Encrypted Wireless Transfers: If you’re using wireless methods like AirDrop or iCloud, ensure that your transmissions are encrypted. AirDrop uses encryption, and iCloud data is encrypted both in transit and at rest on Apple’s servers.
2. Device Security
- Updated Software: Keep both your iPhone and computer updated with the latest operating system versions and security patches. This helps protect against vulnerabilities that could be exploited during the file transfer process.
- Trusted Devices: Only transfer files to and from devices you trust. Connecting your iPhone to an unfamiliar or public computer can expose your data to potential theft or malware.
3. Network Security
- Secure Networks: If you’re using a method that relies on an internet connection (like iCloud), ensure you’re on a secure and trusted Wi-Fi network. Public Wi-Fi networks can be insecure and expose your data to interception.
- VPN Usage: Consider using a Virtual Private Network (VPN) when transferring files over the internet to encrypt your data and protect it from potential eavesdroppers.
4. Data Encryption
- Encrypt Backup Files: If you’re backing up your iPhone to your computer using iTunes or Finder, you can choose to encrypt your backup. This adds a layer of security by requiring a password to access the backup files.
- File Encryption: For highly sensitive files, consider encrypting the files themselves before transferring, ensuring that even if intercepted, the data remains protected.
5. Physical Security
- Secure Access: Ensure that both your iPhone and computer are protected by strong passwords, PINs, or biometric security (such as Touch ID or Face ID on the iPhone). This prevents unauthorized access to your devices and your data.
- Awareness of Surroundings: Be mindful of your surroundings when transferring files, especially in public spaces. Physical oversight can lead to data theft or loss.
6. Use of Reputable Software
- Trusted Applications: Use reputable and secure software for file management and transfer. Whether it’s iTunes, Finder, or third-party software, ensure it’s from a trusted developer and regularly updated.
By adhering to these guidelines, you can significantly enhance the security of transferring files from your iPhone to your computer. It’s important to maintain a proactive approach to security, regularly reviewing and updating your practices as needed to protect your data.
Is there a way i can transfer my files wirelessly?
Yes, you can transfer files from your iPhone to your computer wirelessly using several methods. Here are some of the most common wireless file transfer options:
1. AirDrop
- For Mac Users: AirDrop is a convenient way to transfer files wirelessly between your iPhone and Mac. Both devices need to have Wi-Fi and Bluetooth enabled, and they must be within a certain range of each other. You can select the files you want to transfer on your iPhone, tap the share button, and choose your Mac from the AirDrop section.
2. iCloud
- For Both Windows and Mac Users: iCloud is a cloud storage service that syncs files across all your devices. By saving files to iCloud Drive or using Photos with iCloud Photos enabled, you can access your files on any device, including your computer, that is signed in with your Apple ID. iCloud for Windows can be downloaded and installed on a PC to access iCloud Drive files directly from File Explorer.
3. iCloud Photos
- For Accessing Photos and Videos: If you have iCloud Photos enabled on your iPhone, your photos and videos will automatically upload to iCloud and can be accessed from a Windows PC through the iCloud for Windows app, or on a Mac through the Photos app.
4. Email and Messaging Apps
- For Small Files: You can email files to yourself from your iPhone and open them on your computer, or use messaging apps that are accessible on both your iPhone and computer to send files to yourself or others.
5. Third-party Cloud Services
- For Both Windows and Mac Users: Services like Dropbox, Google Drive, and Microsoft OneDrive offer apps for both iPhone and PC/Mac. You can upload files from your iPhone to these services and access them on your computer through their respective apps or websites.
6. Third-party Wireless Transfer Apps
- Various Options Available: There are numerous apps available on the App Store that facilitate wireless file transfer between iPhones and computers. These apps typically work by creating a temporary connection between your iPhone and computer over Wi-Fi. Examples include File Transfer, Air Transfer, and Documents by Readdle.
Steps for a Secure and Efficient Wireless Transfer:
- Ensure your devices are connected to a secure Wi-Fi network to prevent unauthorized access.
- Keep both your iPhone and computer’s software up to date for compatibility and security.
- Consider the size and number of files you’re transferring; some methods may be better suited for larger files or bulk transfers.
Wireless transfer offers the convenience of moving files without the need for cables or physical connections, making it an excellent option for quickly sharing photos, documents, and other data between your iPhone and computer.
How long will it take for the transfer to complete?
The time it takes to transfer files from your iPhone to your computer can vary widely depending on several factors:
1. File Size and Quantity
- Large files or many files take longer to transfer than a few small ones. High-resolution photos, videos, and extensive music collections will require more time.
2. Transfer Method
- Wired connections (using a USB cable) are typically faster than wireless methods. For example, transferring files via a Lightning cable with USB 3.0 support can be quicker compared to using AirDrop or cloud services like iCloud, especially for large amounts of data.
- Wireless transfers can be convenient but are generally slower, affected by Wi-Fi speeds and the distance between devices. AirDrop can be relatively fast for smaller files or if both devices are close to each other, but larger transfers might take more time.
3. Network Speed (for Wireless/Cloud Transfers)
- When using iCloud or other cloud services, the speed of your internet connection plays a significant role. High-speed internet connections can upload and download files much faster than slower connections.
4. Device Performance
- The overall performance of your iPhone and computer can impact transfer speeds. Older devices with slower processors or USB ports might transfer files more slowly than newer, high-performance devices.
Estimating Transfer Time:
- Small to Medium Files (a few photos or documents): These can transfer in seconds to a few minutes, especially with wired connections or AirDrop.
- Large Files (high-resolution videos, large music libraries): Depending on the transfer method and file sizes, it could take from a few minutes to several hours. For example, transferring gigabytes of data over a wired connection might take tens of minutes to over an hour, while doing the same over a slow Wi-Fi connection might take several hours.
Practical Tips for Speeding Up Transfers:
- Use a USB cable: For large files or bulk transfers, a wired connection with a USB cable is usually the fastest option.
- Minimize Distance for AirDrop: If using AirDrop, ensure the devices are close to each other to optimize transfer speed.
- Optimize Network Settings: For cloud transfers, ensure you’re on a fast and stable Wi-Fi network. If possible, connect your computer to the network via an Ethernet cable for increased stability and speed.
- Prepare Your Devices: Close unnecessary applications on both your iPhone and computer to free up resources for the transfer process.
In conclusion, the duration of a file transfer from an iPhone to a computer can vary significantly based on the above factors. Planning your transfer method based on the size and urgency of the files can help manage time expectations effectively.

Conclusion
Transferring files from an iPhone to a computer is a versatile and essential process for iPhone users, enabling them to back up important data, free up storage space on their device, edit files on a more powerful machine, and share content more easily. With the advancement of technology, there are now multiple methods to accomplish this task, catering to different needs and preferences. Whether through a wired connection using a USB cable, wirelessly via AirDrop or iCloud, or through various cloud services and third-party apps, users have a range of options at their disposal.
The choice of method depends on factors such as the size and type of files being transferred, the urgency of the transfer, the available technology (such as USB ports or Wi-Fi speed), and personal convenience. While wired transfers are generally faster and more reliable for large amounts of data, wireless methods offer convenience and flexibility, especially for smaller files or when a cable is not readily available.
Security and privacy considerations are paramount during this process. Using original or certified cables, secure Wi-Fi networks, and updated software can help protect your data from unauthorized access or corruption. Additionally, understanding the basics of each transfer method can enhance the efficiency and effectiveness of the process, ensuring that your data is transferred safely and intact.
In conclusion, transferring files from an iPhone to a computer is a straightforward process that can significantly enhance your digital experience. By choosing the right method for your needs and following best practices for security and efficiency, you can seamlessly move your data between devices, ensuring that your valuable information is always where you need it to be, backed up, and secure.
To learn more about us visit our about us click here